|
Setting up a new Outlook email account
To setup a new Outlook email account to automatically send and receive emails, perform the
following.
Open Outlook and in
the tool bar at the top click on "Tools" and then "Email Accounts".
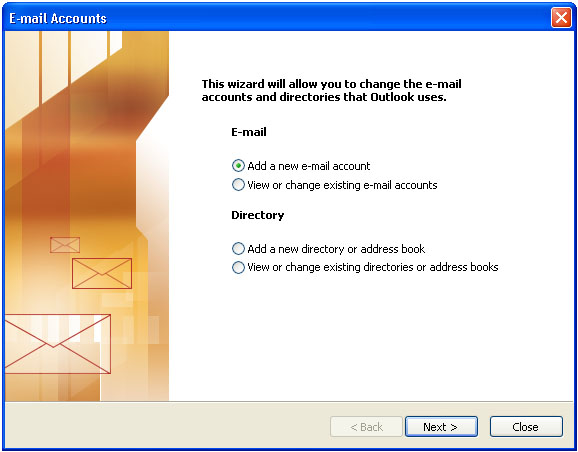
This will open a
small popup window which is shown above. Make sure the "Add a new e-mail
account" is
selected. Click "Next".
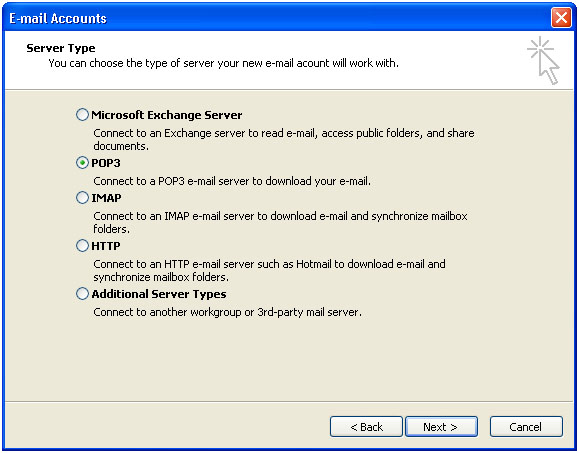
For an LSI, Road Runner or COX
email account select "POP3" for the type of account and then click "Next".
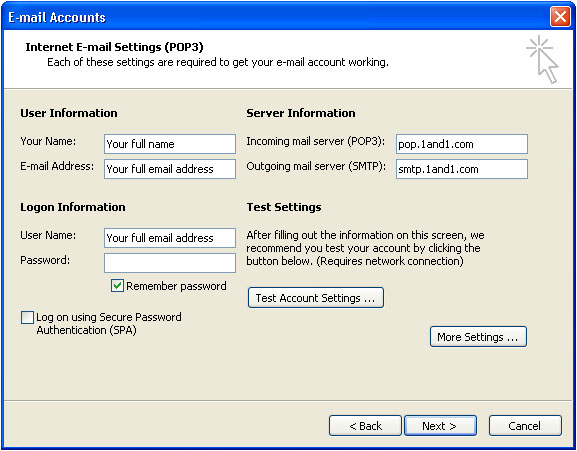
Enter your full name in the "Your
Name" box. What
you enter into this box is what the person on the receiving end will see as who
the email is from. If you enter Santa Claus, then the email will be seen as
from Santa
Claus on the receiving end. I recommend using your full name so the recipient will know who the
email is from. I get emails from Susan's with no last name and don't know
which Susan sent it.....
Enter your full email address in
the "E-Mail Address" box. When the person receives your email and
clicks reply, the reply will be emailed to the address you fill into this
box. For example, if you sent an email from
mike@aol.com and enter tim@aol.com into
the "E-Mail Address" box then when someone clicks reply, the reply
will be emailed to tim@aol.com and not
mike@aol.com. Note: for COX and Road
Runner email accounts enter only the first part of your email account and
not the @xxx.com portion.
Enter your full email address
into the "User Name" box and enter your email account password
provided by LSI into the "Password" box. Make sure the "Remember
password" box is checked or you will be required to manually enter your
password for every send and receive.
Last enter the information shown
above for the POP and SMTP servers if you are setting up an
LSI email account. If you are setting up a Road Runner or Cox account then
enter the appropriate information from below.
For POP
servers ....
Road
Runner email accounts enter pop-server.san.rr.com
COX email
accounts enter pop.west.cox.net
For SMTP
servers ....
Road
Runner email accounts enter smtp-server.san.rr.com
COX email
accounts enter smtp.west.cox.net
Next click on the "More
Settings" button on the lower right.

Click on the "Outgoing Server"
tab at the top and then check the box for "My outgoing server (SMTP)
requires authentication" and make sure the "Use same settings as my
incoming mail server" radio button is selected. Click "OK" .
You can now click "Test
Account Settings" ... to verify operation. A pop up window will test all
functions of the email account and show completed for each line. If there is
an error please contact Dave for more details.
You can now click "Next"
and "Finish" to complete the setup. Your Outlook email account is now
setup and ready for you to use.
Happy emailing!
|